Tips
Part 1: Heirloom Pizzelle
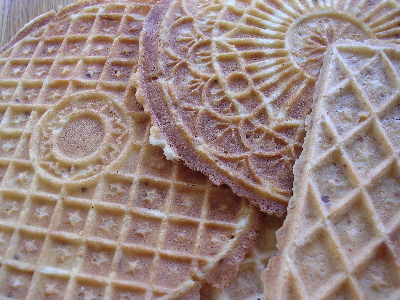
Most pizzelle baking irons are round, probably because it’s much easier to get lace-edged circles than any kind of rectangle. But regardless of shape or perfection thereof, these crisp, light not-too-sweet cookies look great on the plate – while they last. Scroll down to skip straight to the recipe.
In the middle of the Northeastern winter, when gardening consists largely of spraying insecticidal soap and looking out the window at the naked spot where you meant to plant a chamaecyparis ‘Filifera’ but didn’t, baking is a natural outlet for some of that thwarted creative energy, aka urge to potter around.
Said urge might be resistible if it weren’t for the Pavlovian aspect, but just as springtime is full of cues to get out there with trowel and pruning shears, the Let’s Banish Darkness season* is laden with near constant reminders that cookies should be made.
Some years we begin with gingerbread, adding the warm perfume of spices to old reliable butter + sugar + flour + oven = happiness; but we usually start with pizzelle, a family tradition from the Italian side of Bill, who arrived in my life equipped with his grandmother’s pizzelle iron.
That would be grandmother Josephine, the world’s greatest cook, born Giuseppa Cario in 1894, near Palermo, resident for most of her life in Washington, PA (near Pittsburgh).
The grandmotherly pizzelle iron IS iron, not the more modern cast aluminum. And it has both a very long handle and little feet, like the feet on old cast iron skillets, suggesting original design for use on an open hearth although they may simply be there to provide balance; the applied handle means the plates don’t lie flat.
Most importantly, the iron has grandma’s initials and those of grandpa Fidele engraved on one side. On the other is the date: 1931, the twentieth year of their marriage.
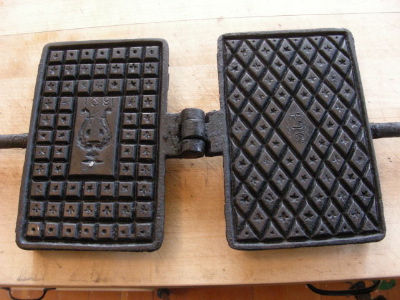
The personalized parts are not deeply cut, so they never show up as clearly as the patterns standard on the iron, but that just adds to the challenge. If the dough comes out just right, you can see ‘em. If it doesn’t, the pizzelle are still delicious and of course if you’ve gotten close enough to eat them, you don’t have to see the initials to know they’re there.
The basic batter is easy to make, and over the years I’ve tried many variations, some with vanilla, some with citrus rinds, some with crushed nuts and spices. Even chocolate, which is better than it sounds but not all that terrific unless you’re one of those people with a chocolate problem. Reception is always the same: Bill takes a bite and then says “My grandmother’s had anise in ‘em.”
E-bay is rich with vintage pizzelle irons, both stovetop and electric, but there are many modern versions, including several with non-stick coating (which is widely considered non-good). Fante’s in Philadelphia has a particularly broad selection, including a version of our family heirloom that you can engrave with YOUR initials and pass down to your grandchildren.

PIZZELLE
are ideally so thin they’re almost translucent, their intricate patterns picked out in the gold brown of perfect toast (middle top). But achieving this goal is not essential. Even when quite thick they’re still delicate, and tasty doneness can be anything from barely colored to almost burnt. In all of its manifestations homemade is so much better than commercial it’s like the difference between a twinkie and a Payard petit four.
What you’re making is basically a batch of extremely thin waffles and as with all waffles success is not instant; you generally have to discard the first couple. This was clearly no problem in former times; old fashioned recipes make 60 or more. This one yields far fewer, but it can be doubled effortlessly as long as you have a sturdy mixer.
For 18 to 24, depending on size:
2 large eggs, at room temperature
½ cup sugar
flavoring: either 1 1/2 teaspoons vanilla or the shredded rind of a lemon – or half orange – or about ¼ teaspoon anise oil (not anise extract) or for Bill a tablespoon of anise seeds
¼ pound butter, melted and cooled, plus more for the iron
1 heaping cup cake flour or 1 scant cup all purpose flour, plus a bit more if needed
1 teaspoon baking powder ( use only 1 ½ teaspoons if doubling the recipe)
½ teaspoon salt
a pizzelle iron is a must; a pastry brush (for buttering the iron) and a knife with a long narrow point (for cookie prying) are nice but not essential. A small wire brush is a good cleaning tool for vintage iron baking irons. Otherwise, consult instructions that come with the gizmo.
1. Beat the eggs and sugar at medium speed until the mixture is thick and pale and falls from the beaters in a fat ribbon. While this is happening, melt the butter and thoroughly mix the cup of flour with the baking powder and salt.
2. When the egg mixture is ready, beat in the flavoring, then slowly add the butter.
3. Gently fold in the flour mixture by hand and set the batter aside, loosely covered, for 15 to 30 minutes.
4. Heat the pizzelle iron on a medium flame until a drop of water sizzles vigorously, not quite dancing but almost. Brush the plates lightly with melted butter. ( Many recipes suggest cooking spray, not my idea of fun but if you use it all the time you probably like it).
5. Gently stir the batter/dough, which should be the texture of very stiff whipped cream. Add a bit more flour if it’s softer but err on the light side; it’s far easier to add more than try to compensate for too much. Put about a tablespoonful on the iron, spreading it out a bit as you deposit it. Slowly close the iron and use a table knife to remove anything that oozes out. Peek after about 30 seconds, the pizzelle should part from one side of the iron and the surface look dry. If it’s dark brown turn down the heat. Reclose iron (and turn if on stovetop) and cook about 30 seconds more.
6. Open iron, lift/pry off cookie and place on a cooling rack. If it’s too thin, add a bit more flour. If it doesn’t come off neatly, return iron to the heat to dry it out some more, then pry as necessary to clean the iron. Get the iron hotter and greasier next time; the pizzelle will tell you what it needs more succinctly than I can.
7. Attempt to prevent your husband from eating them all immediately. They keep well for 10 days or so in an airtight tin.
* The last time I addressed this subject I was in the throes of irritation at the people who are endlessly on about the meaning of Christmas trees and so neglected to mention things like Saturnalia and Hanukkah. Please consider them mentioned. That post also includes a recipe for shortbread, the world’s easiest holiday cookie and one of the very best.
But first you may wish to give yourself some carol-canceling earplugs. Bill gets mine though Cabela’s – which is where he gets just about everything he doesn’t get from Orvis – but there is also, it turns out, a place called The Earplug Super Store whose extensive selection suggests that noise pollution is every bit as much of a problem as you thought.
Earplugs are also widely available at bricks and mortar, of course. Sporting goods stores that cater to gun owners have the most effective models, but many drugstores also sell plugs rated at 30 decibels, the strength needed to muffle jolly shopping music without silencing the person who shouts “ Look out! That beam is falling!!”
Can’t Go Wrong Giving Any of These
* Stainless steel garden fork with synthetic handle, such as this ergonomic Radius available through Amazon. The fork is an essential tool, so many catalogs offer high end beauties with stainless steel tines and sturdy, well-made hardwood handles. Your garden friend will probably be even happier if the handle is made from less handsome but more useful synthetic. One of the great things about stainless steel is total freedom from rust, so it’s nice to be equally blithe about rot. Translation: never, ever worry again about leaving it out in the rain.
* Small snub nose pruner. Pretty sure I’ve extolled these before, since they are absolutely the best for light-duty general pruning and harvest of all things with stems from flowers to hot peppers to winter squash.I love them especially because I don’t wear belts and these don’t stab you through your pockets.
* Lightweight garden gloves with nylon backs and nitrile palms. The most common brands are Boss and Atlas, both of which I have in multiples because years ago when they were still difficult to find I compulsively bought another pair every time I saw them and they take forever to wear out, even under near constant rough use in soil that resembles gravel.
They won’t protect against major thorns and only the palms are waterproof, but other than that they are close to perfect because they combine their fabulous toughness with being so thin you can feel what you’re doing almost as well as you can barehanded.
*Japanese garden knife, aka soil knife. Kristi the hardworking garden helper wears hers in a holster on her belt when she’s wearing a belt and rather daringly just sort of shoved into the back of her waistband when beltless. Either way, don’t go into the garden without this workhorse saw/knife/all-purpose digger, especially handy in tight spots and among rocks. Might as well get it from Fedco and put your seed order in at the same time.
* Membership in the Garden Conservancy – for design lovers – or the Maine Organic Farmers and Gardeners Association – for food growers everywhere in spite of its name. Or both, since it’s impossible to choose between food and culture.
Warning: Once you start in the dot-org direction it’s easy to fall down the slippery slope and start thinking that donating to worthy causes “in the name of” is a gift to the namee. This is of course completely bogus unless that noble person has already asked Santa for brownie points. Nothing hugely wrong with it – assuming you also give them a present that actually resembles a present – but please don’t forget that if part of the deal is a grateful acknowledgement from the cause, the other thing you have given your friend is a mailbox polluted with pleas for more, for the indefinite future.
After you’ve “established a relationship,” there’s no way to block these mailings without asking each individual organization to please stop. And the same is true for catalogs sent by any store that you’ve bought something from. But as you already know if you have ever, even in the distant past, subscribed to a magazine, the bulk of the catalog avalanche comes from companies that bought you (or at least your name and address). An outfit called the Privacy Council promises to turn back a lot of this tide, conveniently all at once, but they also promise to remove you from Stop Political Calls, which may or may not be a good thing – the Privacy Council service is sponsored by the very people sending you all this junk. Stop Political Calls seems to be a lobbying non-profit which may or may not keep robocalls at bay. Never heard of it until I saw it on the Privacy Council’s otherwise no-brainer say goodbye list, so I don’t know how well it works.
* Gift Certificates can be great when they’re for something specific: spring delivery of a truckload of compost, say, or a dozen massages at Betty’s Backsaving Boutique.
But gift certificates good only for shopping at a particular store have all the impersonality of money with far less of its convenience. And the fact that they’re sold in rounded amounts makes problems of its own. There is probably someone living who chooses things that cost less than the gift and walks away from a few bucks in change; but most people end up with something that costs more, paying the difference out of their own pockets. Nice deal for the store. James Surowiecki wrote a terrific piece about this, The Gift Right Out, back in 2006 and it’s still a terrific read.
Note to bakers and would be bakers: Only a few baking days until Christmas. To make them less stressful (and more likely), I stock up on large quantities of probable ingredients before I choose the recipes. Butter, eggs, chocolate, nutmeats, dried fruits, flour and spices all keep fine , and having them on hand makes it easier to use them when a crumb of free time appears.
Shopping Alert: If you love apples, it’s smart to see Thanksgiving as the deadline. Many orchard farmstands make that closing day and many more close soon after, shutting the window on neat choices for most of us.
We went on the annual stock-up outing about 10 days ago – across the river to New Paltz, to Jenkins-Lueken’s, where we’ve been going for years. But we didn’t notice until we got home that the cider is UV treated. That means we’re still on the hunt; you need raw cider to get fizzy cider. Next stop, the listings at pickyourown.org, a national orchard locator searchable by state.
Meanwhile, there is a big box in the barn containing about a bushel of apples and right here it should be admitted that the barn is our enabler. Apples MUST be stored very cold, nothing ruins quality as fast as warm temperatures. If all you have is a refrigerator, fill it with varieties that will not be found after the orchards close.
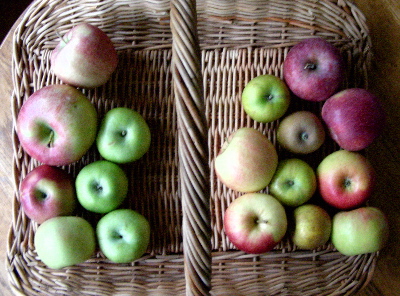
Representatives from our current stockpile. On the left of the handle, clockwise from green:(3)Rhode Island Greening, (2) Honeycrisp, (2) Cameo. Right of the handle, clockwise from red: (2) Stayman Winesap, (2) Northern Spy, (4) Golden Russet – in a line up the middle – and (2) Jonagold.
Golden Russet : Born in New York, already well known in 1848. Described by the invaluable Seed Savers Exchange Fruit, Berry and Nut Inventory as “ The champagne of cider apples,” it’s delicious for just about any use except (unless you peel it) eating out of hand. An excellent apple to stock up on; it keeps very well.
Jonagold: A marriage performed by New York’s Geneva experiment station, introduced in 1968. The sweetness of Golden Delicious combined with Jonathan’s size, juiciness and slightly sharper flavor. Not always as tart as ideal for best flavor but usually yummy. Tough skin, though.
Rhode Island Greening: ! Pie ! And thus it has been for about 400 years. A tad on the sharp side for fresh eating but ideal in savory applications such as sautéed apples and onions to go with winter’s roast pork.
Northern Spy: Can’t say I grew up with this; it’s more popular in New England than in Pennsylvania. But it has that remembered from childhood quality, fuller flavored than modern fruit – or so it seems. Both crisp and tender, both sweet and tart, good both fresh and cooked. My desert island “if you could only have one.”
Honeycrisp: New kid on the block ( 1991) cross of Macoun and Honeygold, from the University of Minnesota. A good compromise for fresh eating if your family is, like mine, divided on the sweet vs. sharp question.
Cameo : Also recent (1987), a lucky find chance seedling from Washington state. Crisp and balanced in the manner of Honeycrisp but more aromatic and frequently huge.
Stayman Winesap – labeled “Stamen” at the stand where we got it, with no indication which of the 4 variations on Stayman Winesap it might be. And I’m actually guessing at the Winesap since there is also a Stayman apple, grown mostly in the south and considerably less red if its pictures are any indication. Assuming they are some kind of Winesap they should make dandy applesauce.
The grumble and cake part
is because the New York Times magazine recently addressed the subject of apple cake with, I suppose not surprisingly, the mandate to be as contemporary and hip as possible. Net result, no fault of the Times’ sensible Amanda Hesser? A chef who was determined to improve an easy, tasty, but the recipe already exists cake, came up with a no doubt delicious but utterly uncakelike fruit-bottomed “soufflé crepe.” Shelf life of original cake, which could be eaten out of hand: a few days, and then toward the end you could probably toast it. Shelf life of chef’s goodie – several minutes; so be sure to have that plate and fork handy before you start.
Well ok, but was it really impossible to make an old fashioned everyday cake sort of cake that would be interesting to eat? And could one not make it with butter instead of oil?
Distantly remembered a long-ago struggle to find – and then when I couldn’t find, develop – a carrot cake based on butter instead of the usual oil. Checked out the recipe (it’s in Reading Between the Recipes). Unfortunately, it’s a layer cake, with frosting and other non-everyday aspects, and although the apple one could be a sheet cake something prettier would be nicer.

the experiment. Left to right: Cakes 2, 3 and 4
Four cakes ensued, one that we will not discuss and three that were different primarily because I kept screwing up. Cake # 2 was heavy and damp, because I couldn’t find the bundt pan and tried to bake it in a tube pan.
I know this was the problem because the bit of extra batter baked in a little glass bowl was very close to just fine. But did I pay attention? I did not. Cavalierly choosing to keep messing around I omitted the touch of oil, reduced the sugar, and upped the pecans for cake #3. And then, it being quite late by this time, just forged ahead after discovering the only white flour on hand was unbleached.
Commonly available unbleached flour makes tougher, heavier cakes than bleached flour. Simple fact. More nuts sat on the apple flavor; sugar and oil were both missed. Cake # 4 was back to formula #2, this time in the right pan with the right flour, for a long-keeping, velvety butter cake studded with apples and nuts. Big, too, so there’s plenty for all the relatives or you could freeze half and have it on hand for cake emergencies.
Chunky Apple Cake with Pecans
More like dice than chunks, truth be told, if you want the cake to resemble cake instead of steamed pudding. On the other hand, the rather steamed puddingy cake #2 was Bill’s favorite, so it’s hard to go completely wrong.
3 ½ cups roughly 1/2 inch dice or slightly larger chunks of peeled crisp tart cooking apple (see above for variety suggestions. Granny Smith will do in a pinch)
2 ¼ cups sugar
1 ½ tsp. kosher salt
3 1/4 cups bleached all purpose flour
1 tsp. baking soda
scant ½ tsp. baking powder
8 ounces unsalted high fat butter such as Plugra, at cool room temperature
3 eggs and 1 egg white
1 tbl. bland vegetable oil
2 teaspoons vanilla
½ cup sour cream
1 cup chopped pecans
1. In a non-reactive bowl, mix the apple dice with 1 cup of the sugar and 1 teaspoon of the salt. Set aside for an hour and a half. Stir when you think of it. (Pulling juice out ahead of time this way minimizes the holes-around-the-cooked-fruit effect that otherwise plagues these cakes.)
2. While apples sit, get everything else lined up. Let eggs and sour cream come to room temperature. Butter and flour a standard (10 cup) bundt pan. In a large bowl, thoroughly mix the flour with the remaining ½ tsp. salt, the soda and the baking powder, either by repeated siftings or much stirring with a wire whip. Heat the oven to 350.
3. When apple sitting time is about up, cream the butter, then add the remaining 1 ¼ cups sugar and cream again until pale and fluffy. Lightness of cake is directly related to whether you’re doing this with a stand mixer for about 8 minutes or your own personal arm ‘till you’ve had enough.
4. Beat in the eggs and white, one at a time, scraping the bowl from time to time. Beat in oil, vanilla and sour cream, again scraping right to the bottom of the bowl. Beat in free liquid from apples.
5. Make a well in the dry ingredients, scrape the wet mixture into it and stir together as gently and briefly as possible. Batter will be very thick. Stir in the apples and remaining juices and the pecans, then turn into the prepared pan. Thump the bottom of the pan on the work surface to reduce large air bubbles.
6. Bake until all the usual done signals: well risen, browned, pulling away from the sides of the pan and a toothpick comes out clean, anywhere from 55 to 70 minutes. Cool in the pan on a rack for 10 minutes, then turn out and cool completely before slicing. Cake will be most delicate and cakelike on the first day but still tender on days 2 and 3. Maybe more but I just made it 3 days ago so who knows?
No doubt about it, backyard leaf blowers are powerful players in the anti-social sweepstakes. Although they’ll never be as good as ATVs at damaging land while abetting childhood obesity and shattering the public peace, pound for pound they’re unbeatable for noise pollution, noxious emissions, and the erosion of ordinary civility.
On the other hand, there’s also no doubt that raking is the yard work equivalent of ironing, possibly because it’s equally taxing on the back. Even people who love gardening hate raking, even my friend and helper Kristi, a woman up for ANY outdoor task that doesn’t involve chemicals or power tools.
So I shouldn’t have been surprised when she looked at the leaf-covered Maine lawn, looked at me ( I was holding 2 rakes) and said “ I wish you had a leaf sweeper.”
“ A what?”
Next thing you know, she’d gone home and gotten hers. Turns out the hand powered leaf sweeper is the autumnal third way: a leaf gathering machine that taxes neither the body nor the environment. It looks and works about like a lawn mower except that instead of blades it has brushes. Push it along and the brushes sweep leaves up and back into a collecting sling that holds about 7 cubic feet and is very easy to empty.
Kristi’s is a 26 inch Agri-Fab which sells for around 135 bucks. There are other, ostensibly sturdier, brands but differences – except in price – appear to be pretty minor.
Good Things about hand powered leaf sweepers:
* Easy to use, after you practice for a while and learn best adjustments of brush height and handle-angle.
* Quiet, only a gentle whirr and the whoosh of leaves headed for the sling.
* Useful for other kinds of picking-up. Kristi takes hers onto the drive through her pine woods to collect the needles we use to mulch strawberries and pack dahlias.
* Comparatively inexpensive, even the deluxe 31 inch model sold by People Powered Machines is only $270.00 ( I know, I know; but it’s 2 or 3 times faster than raking and far less ache-producing.)
The Nothing is Perfect part:
* Forget it if your lawn is mostly uneven, with many little hills and minor undulations. Kristi’s works great at her place, which is more or less flat. Not great at our place, a festival of irregularity.
* Seven cubic feet is not a lot if you have a lot of leaves. Kristi puts a sheet at the edge of each lawn section and empties the collector into it several times before gathering the sheet edges and hauling the contents to the leaf pile.

Just a bit of autumnal eye candy; the leaf sweeper is on view at the sales sites and is not a thing of beauty. Chrysanthemums like these are easy to grow, about which more next spring when it’s time to order rooted cuttings.
Spring forward; fall back, say phooey to the whole probably doesn’t save energy thing. Gardeners always know what’s what, daylight-wise, and no amount of fiddling with the clock can make any more of it.
We’re already hardwired to natural seasons. Winter – finally! – is for taking a break, though it’s work to resist catalogs in which every flower is blemish-free and every fruit delicious. Spring is for doing the monster sprint: move the stuff that wasn’t divided last fall, plant and plant, weed and weed and prune and pinch andthenthenextthingyou know, it’s harvest. Roast the summer tomatoes; freeze the succotash; move the tender plants indoors and get ready to get your jollies from things that grow in pots.
Only one problem: Whether you have the above hot-cold version, the western dry-wet or the tropical wet and more wet, seasons appear to be headed toward Hades in a globally warmed handbasket. Familiar rituals need adjustment.
What’s wrong with this picture ( other than the fact that real autumn leaves, having been hard at work all summer, don’t look as though they’ve had work done)?
Until this year, our record late date for nasturtium killing frost was October 6th, two days later than the previous record. This year, it was the 28th. Authorities quibble about how much longer the northern growing season lasts, but nobody has any trouble tacking a week or more on each end. And nobody ( unless you count the USDA) has any trouble seeing that most northern climate zones should have higher numbers than they did a decade ago.
Coping: Don’t assume this means you’ve been promoted. Zones measure only the lowest average winter low. That means little if there is also a 6 week warm spell that starts in mid-February and plunges to a frigid end after persuading your peach trees to start blooming. In the north, planting fruit trees on north-facing slopes is more important than ever. In the south, remember the zone range has a high end as well as a low one. Cold-loving plants like sugar maples and rhododendrons are now an unwise bet at the hotter end of their range.

Warmer weather means earlier leaf-out for many trees. That means spring ephemerals like this bloodroot – and crocus, narcissus and bluebells – may not get as much sun as they need to come back strongly year after year.
Coping: plant spring bulbs closer to tree’s drip lines, or out in the open. Consider limbing up – winter is a great time to look at the shapes of deciduous trees and think sculptural thoughts.

This Magnolia soulangeana was planted by an optimist, probably about 50 years ago, and was already huge when we bought the Hudson Valley house. In the old days, it was like Charlie Brown and the football, blossoms would start to unfold, a pink cloud on the horizon and then BAM! browned by frost, year after year. Not any more.
Coping: Fine to plant trees that were once marginal but do bear in mind that fruit-free male trees aren’t problem free. They don’t bear messy or smelly fruits, but they do add to the pollen burden, and allergy sufferers are already going to take a hit: increased carbon dioxide does great things for ragweed as well as poison ivy.

(The pruner is there to show how long the spears are; they were cut in the standard way: with a knife, under ground, to deny any passing beetles a place to land.)
Bill grew up knowing that “if the patch is strong, you can cut asparagus until the 4th of July.” Not true when you start cutting 2 or 3 weeks earlier than formerly. Going by the calendar instead of the size of the spears was never a completely wise idea, but now it would be a recipe for greatly diminished production if not outright death.
Coping: Stop cutting when new shoots start being thinner and fewer. Warm winters mean more asparagus beetles ( as well as every other wretched bug I can think of at the moment). Be sure to clean away old stalks and all surrounding debris; that’s where the eggs winter over.
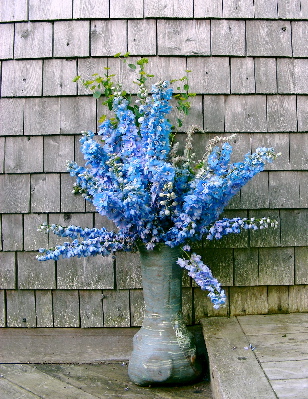
What’s wrong with THIS picture? We don’t have that all many delphiniums. The bouquet is a consequence of a brutal rainstorm.
Coping: Delphiniums are famous for this, regardless of climate doings, but there’s no question summer storms are becoming stronger. Think carefully before planting things that are vulnerable to wind. Fertilize modestly; encouraging plants to be as tall as possible is no longer a good idea unless you’re fond of the staked-up look.
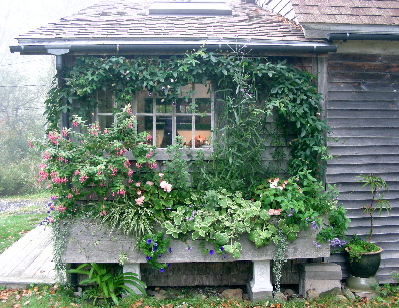
Storms are also a problem for brittle plants like tender fuchsias. The one on the left is inconspicuously anchored to the wall so strong winds won’t bust it.

This eye-catching fall display is pure genius on the part of the farmer. Not only does it announce abundance to passers-by on the busy highway, it’s also easy to cover on cold nights. Winter squash that is blemished by frost won’t keep. The grand assortment of squash that’s available at farmstands right now won’t keep either, btw; be sure to buy soon and store at home for the best flavor assortment.

It’s tempting to leave houseplants out as long as possible, especially when they’re protected by being close to the house. But if you plan to enjoy them indoors they need time to get adjusted to low light and dry air. Bringing them in when it’s still warm and bright enough to put them in an unheated sunroom or other transitional space will increase the chances that they stay strong, for when you need them most.

outside

inside. Our friend from the window box. Passionflowers are particularly willing to do the in- and – out dance. Logee’s and Brushwood Nursery are among the many sellers with tempting assortments.

Daylight saving thought to live by: Every roasted or dried or frozen tomato you put by is saved daylight; as is every flower on winter’s amaryllis, there because the bulb was nourished by sun on last summer’s leaves.
Brewer, Maine, October 11, 2007, a slide talk for the Maine Herb Society. We get to the part where the sky comes in, as an important part of garden design.

And the illustrative images include

Not surprisingly, people want to know what it is. Also not surprisingly, I have brain melt and forget until I’m driving home.
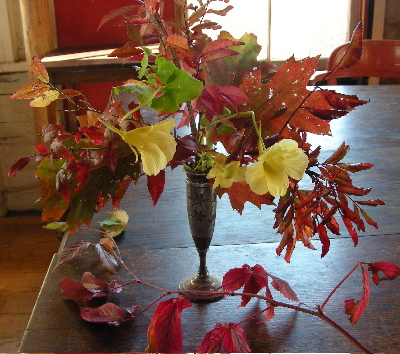
So. The bright red poppy is Papaver bracteatum, sometimes called the Persian Poppy or Great Scarlet Poppy. It’s a perennial, very similar in appearance, needs and habits to old fashioned Oriental poppy (P. orientale).
But Great Scarlet is accurate: flower stems are 4 or more feet tall, thicker and stiffer than Oriental stems; the flowers are a good 6 inches across and the scarlet is truly breathtaking, even redder than the Oriental ‘Beauty of Livermere’ ( or Livermore), with which P. bracteatum is often confused.
Plants of the Beauty, itself well worth having, are sold by Bluestone Perennials and High Country Gardens, but if you want true bracteatum you must – as far as I can tell – grow it from seeds. J.L. Hudson sells them, but I didn’t know that when I bought mine, from Thompson and Morgan, the seed company everyone loves to hate. T&M is expensive, especially in view of how few seeds you get, and germination problems are common. But they have a stupefying variety of nifty stuff not available elsewhere and in fairness it must be said that many of those nifty things are difficult to grow from seed. Caveat garden dreamer when browsing through the too-tempting catalog.
Happily, P. bracteatum is comparatively easy. Sowing where it is to grow is wise, and that should be in very well drained, sandy soil, in bright sun, somewhere in (roughly) zones 3-8. It will do better at the low end; winter cold doesn’t faze it but heat and humidity are not its friends. Remember that like P. orientale it is huge in spring and absent in summer.
Saving seeds sounds great at first – who could argue with growing your own heirloom seeds instead of buying them? But when you take a look at what’s involved with saving things like squash and corn seeds you start seeing the beauty of capitalism. Even easy things like beans and lettuce require you to do your spring planting with fall seed harvest in mind.
But saving tomato seeds is different. Not only can beginning gardeners do it, people who don’t even HAVE gardens can do it, because the best tomatoes to eat are also the best source of seed.
It’s one stop shopping and how great is that? You can save the seeds from a single terrific tomato, no matter where you got it. In theory, at least, you could dig the seeds from a yummy tomato served in a restaurant and save THOSE. The seeds are simple to collect and process. And they last for years.
The only must-have is a tomato that is not a hybrid (read about why here) and that means we should all be very grateful that tomato names now have cachet. Instead of “tomatoes,” pure and simple, the farmer – and increasingly the restaurant – offers Brandywines, Jetstars, Black from Tula and who knows what-all. There are hundreds of ’em. Doesn’t matter. As long as you know the name you can – bless google – just look up “xyz seed. ” If it’s a hybrid that can’t be saved, “hybrid” will be part of the description,

The actual moral of this picture is do not get to the farmers market at 9:30 AM if official start time is 9:00.
I’m going to save seeds from a tomato – a big fat beautiful delicious tomato – I bought at the Rockland, Maine farmers market a couple of weeks ago. It’s called Hillbilly Potato Leaf, so I know that like many delicious heirlooms the plant will have broader, simpler leaves than common tomato plants.

Potato leafness is on the left. These were plucked from full grown plants, but even young seedlings look different enough so you can spot which is which.
Why that might be useful will be discussed presently. For right now, while there are still gazillions of wonderful tomatoes just waiting to be enjoyed – and saved! – here’s how
to save tomato seeds
1. Choose perfect, dead ripe tomatoes. The better they are of their kind, the better your chances of repeat greatness. And of course, the riper the fruit, the more ripe seeds it will contain.
2. Cut the tomatoes across the equator. Scrape the seeds into a glass jar. The surrounding gel will come along. No problem. *
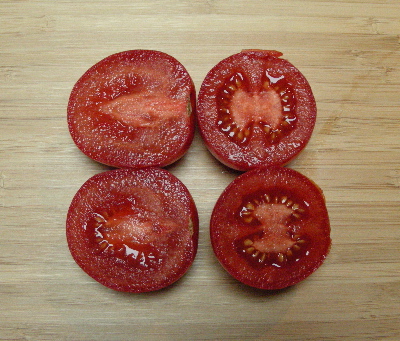
Cross-cutting exposes the seeds so you can pry them out while taking the least amount of tomato flesh. Makes no difference with these little guys (Amy’s Sugar Gem, about the size of a golfball) but if you have big tomatoes with small seed cavities there’s no point in wasting the parts you could eat.
3. Ferment the seeds.**
3a) Add enough water to the jar to make soup out of the seeds and gel. Loosely cover the jar with cheesecloth or a piece of paper towel, so air can get through. Put the jar someplace warm ( not hot), out of the sun, preferably a place where odd smells won’t be noticed.
3b) Wait 2 to 4 days, during which the jar contents will bubble , a cap of revolting moldy goo will gradually form on top of the liquid and most of the seeds will sink. Those that remain afloat are no good.
3c) Lift and discard the cap. Fill the jar with room temperature water and gently swish the seeds around to wash them. Carefully pour off the water and debris, then put the seeds in a strainer and rinse under running water. Don’t press on them; they don’t need to be squeaky clean.
4. Spread the seeds on a paper plate (they stick to china and to paper towel) and let them dry out of the sun, stirring from time to time to expose all surfaces. When they’re dry enough to rattle, they’re ready to store. As long as they stay dry, cool and dark the container is up to you. An ordinary envelope labeled with variety and date will do, but a tightly-lidded jar is better. And if you want to reward yourself – or use the seeds as holiday gifts – there are all sorts of inexpensive supplies like resealable seed packets and moisture proof vials at Garden Medicinals and Culinaries.
* The gel around tomato seeds contains most of the acid that makes sweetness interesting. Recipe instructions that tell you to remove seeds from raw tomatoes should probably be ignored, but if you want to follow them be sure the recipe includes some other source of acidity.
**Many garden bloggers say they don’t bother to ferment tomato seeds and it isn’t absolutely essential, But it does 3 important things:
+ It removes the germination inhibitor that keeps the seeds from sprouting inside the tomato.
+ It gets rid of many seed-borne diseases
+ It separates good seeds from defective ones, vastly improving the quality of your stash.
SOME PLACES TO PUT FOOD BY
(so you can eat locally all year long)
Upstairs: Food Historian Sandy Oliver keeps winter squash under the bed. Bottom of the linen closet is also good; just don’t forget they’re there.
Downstairs: An unheated basement ( 35 to 45 degrees) , a second refrigerator ( or the back of the one in the kitchen) is almost a root cellar. Things to keep in it from harvest to spring: Beets, Carrots, Cabbages, Onions, Wine, Beer, Cheese.
In a cool back bedroom or similar: Potatoes. They like to be cold, but not quite as cold as other roots.
In the pantry/ food cupboard:
Dried: Wild bolete mushrooms, wild or cultivated agaricus mushrooms, tomatoes, shell beans.
Canned: Applesauce, fruit spreads, ketchup, tomatoes, roasted tomatoes for instant sauce.
In the garden: lightly mulched Parsley and Kale will survive until a very hard freeze (@ 26 degrees); the more slowly it gets cold, the more cold they can take. Chard, Brussels sprouts and Broccoli raab aren’t quite as hardy but still can stand – indeed benefit from – repeated light freezes. Many gardening and country food books, including some of mine, suggest leaving beets and carrots in the ground under a heavy mulch and then harvesting as needed. It works fine if you don’t have voles.
In the freezer: Wild mushrooms (morel, chanterelle, sulfur shelf, blewit, hen of the woods) sautéed in enough butter to be a sauce for the pasta, baked potato, winter squash or other starch that is then dinner; Toasted almond pesto or other pesto to use like the mushrooms ; Berries; Whole tomatoes for soup and sauce; Full-meal soups like Minestrone and Corn chowder, Harvest Vegetable Stews like corn, squash and pepper/ tomato, pepper and onion/ snap and shell beans with summer squash. Chickens. Your quarter of a local lamb, pig or steer, divided into the cuts you’ve ordered. Make an inventory and keep it near the freezer!( along with a pen on a string for crossing off)
and a great deal else in a minute (famous last words). For now, the recipes for an omnium-gatherum vegetable soup and a freezer friendly pesto as promised to everyone at MaineFare!
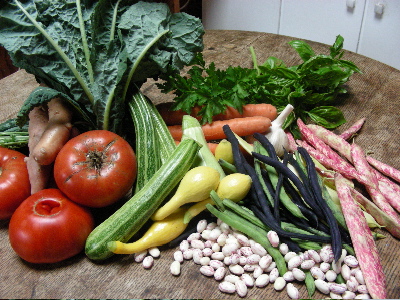
Incipient minestrone, partly gathered from my garden but not all of it because I don’t grow kale, potatoes, shell beans or carrots.
SEPTEMBER SUNSHINE MINESTRONE (aka) Harvest Vegetable Soup
This is a very general guideline; as long as you start with the flavored broth, include both starchy and delicate vegetables and use enough of them to make the soup hearty without turning it into stew, you’re in business.
Classic recipes include pasta or rice and I used to too. But now I don’t, because flexibility trumps the tiny gain in convenience you get from freezing the soup “complete.” There’s usually leftover cooked pasta or rice lying around in the fridge and when there isn’t we just use more good bread – French or Italian, generally – which IS always lying around and may be the most delicious choice anyway.
For about 12 main dish ( large ) servings:
1/3 pound lean salt pork or fatty bacon, cut in 1 inch chunks
3 large cloves garlic
½ loosely-piled cup flat-leaf parsley, leaves and tender stems
grated zest of 1 lemon
1 large onion, cut in small dice
3 quarts water – quality matters. Use filtered if your tap is chlorinated
3-4 cups root vegetables, cut in roughly ¾ inch chunks. Carrots and potatoes mostly, some parsnip and/or turnip if you like but not too much as both of these are rather aggressive.
2 cups fresh shell beans
½ cup celery in medium slices. Not thin. Not chunks.
2 cups firm summer squash, crookneck or small zucchini, cut in roughly ½ inch slices . Halve the squash the long way first if they’re more than about an inch thick.
1 ½ cups snap beans ( Romanos are lovely if you can find them) cut in 1 inch lengths.
3 cups ripe tomatoes, peeled and coarsely chopped
About 3 cups chopped kale or savoy cabbage
A good sized handful each chopped Italian parsley and basil
1. Chop pork, garlic and the half-cup parsley until it looks like hamburger – the processor is fastest ( if you don’t have to wash it by hand).
2. Put the olive oil in a heavy kettle over low heat, add the pork mixture and lemon rind and cook, stirring, until most of the pork fat is released. Add the onion and keep cooking until it is wilted and starting to turn gold.
3. Add the water and bring to a boil. Put in the root vegetables and shell beans, adjust the heat so the liquid just simmers and cook until the vegetables are about half done – no longer crisp but still somewhat tooth-resistant, 15 to 20 minutes.
4. Add celery, squash, snap beans and tomatoes and cook until the roots are tender and the snap beans are al dente, about 20 minutes more.
5. Now the kale and cooking until it’s tender, 10 to 15 minutes. Add the herbs. Let them wilt, then taste and adjust the salt.
6. Serve with pesto – your own, pistachio (scroll down to find it) or Toasted Almond (below), a better choice for freezing. Freshly grated Parmesan is traditional but if you have good local hard cheese why not experiment? You can also skip the cheese entirely or switch it 180 for an entirely new taste treat. Sprinkle some small chunks of young mozzarella over the hot soup as soon as you ladle it into the bowls. It should be somewhere between soft and melted when everyone starts eating.
Note: this produces a soup that’s just barely done, on the theory that it is going to be frozen, which softens things, then reheated, which softens them some more. If you’re planning to eat it right away, cook until the kale is almost falling apart before you add the herbs.
TOASTED ALMOND PESTO
As usual, quantities are just guidelines. Even more than usual, actually, given the difficulty of measuring fresh leaves and the enormous variability of fresh herbs. The goal is to have a fairly even mixture of almond and parsley flavors, with a strong accent of basil and a mild accent of garlic.
To make lots of this for freezing, make multiple batches; the processor heats up the pesto if you ask it to grind too much. The multiples go very fast since you don’t have to wash the processor between them.
For a scant cup, about 8 servings depending on what you’re doing with it:
1/3 cup toasted almonds. (see note about skins)
2 medium sized cloves of garlic – use large if it’s hardneck.
1/3 cup olive oil
2 loosely packed cups chopped Italian parsley, leaves and tender stems.
1 loosely packed cup basil leaves
2 or 3 leaves of sorrel or a squeeze of lemon
pinch of salt
1. Put almonds and garlic in a processor and grind, scraping down the sides from time to time, until you have fine meal. Add about a third of the oil and a teaspoon of water and grind again until you have a paste – it won’t be smooth, but it will be cohesive.
2. Add the herbs (lemon juice) and salt and about a tablespoon of water. Grind to puree. Add the remaining oil and puree again. The pesto should have the texture of thick mayonnaise. If it’s still too solid, add water in very small amounts until it’s right. The more water you add, the more beautiful the color will be. Try not to get too carried away.
Note: The most delicious way to make this is to toast the almonds in their skins; dump them into boiling water; simmer for about 3 minutes, then leave them in the hot water while you work with small batches at a time, pinching the skins off. The boiling not only loosens the skins but also softens the nuts so they grind to a smoother paste. This is not fast work.
In theory, you could buy blanched almonds, toast them, then just give them a brief swim to soften, but blanched almonds – including those hotsy totsy Marcona almonds – don’t taste as good as almonds in the skins. Must be something about the industrial blanching process. I just use the toasted almonds and leave it at that. (If you soften the almonds in their skins and then try to grind them without peeling, the skins don’t grind smoothly with the nuts).
Don’t panic. It’s only summer we’re coming to the end of. Even here in the far Northeast there’s still at least a month of delicious Romanesco zucchini, pale-skinned Middle Eastern cousa and the buttery old fashioned yellow crookneck that’s now almost exclusively a home garden delight.
At first glance, this may seem like no big deal. Zucchini and straight necked yellow squash are year-round supermarket staples, and most winter versions of these vegetables are – unlike winter tomatoes – edible. But they are also edible as in “ eat your vegetables” rather than edible as in “oh YUM! How do you make this thing?
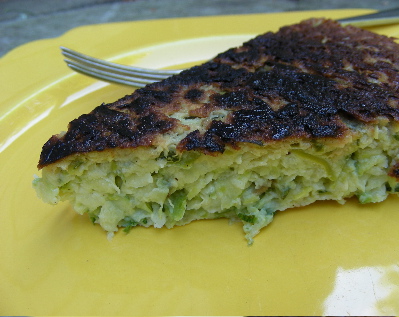
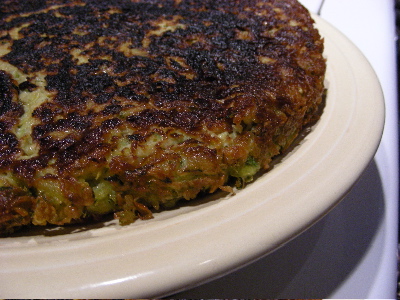
(Squash Tortilla. See below.)
Long about now you may be thinking you’ve totally had it with zucchini, even absolutely perfect zucchini, and that if you find under the leaves or are given by an evil friend one more dark green baseball bat, you will subsist henceforth on potato chips.
But stay! There are two things to consider:
1) There’s no point in trying to stay ahead by harvesting the babies. Tiny squash with the blossoms still attached don’t taste like much of anything no matter how fresh they are.

The one on the left is about 1 day from perfect; the flower is just opening and has not yet been pollinated. The one on the right – I really have seen them this size in stores – is ridiculous. It would also be ridiculous if it were a crookneck or Cousa. The potential for flavor is there, but flavor itself is not.
2. You will not easily tire of zucchini if it’s Romanesco, aka Costata Romanesco, a uniquely firm and nutty variety. This one does taste good when it’s quite small and, even more astonishing, the not-seedy part will still be worth eating when the thing’s the size of your forearm.
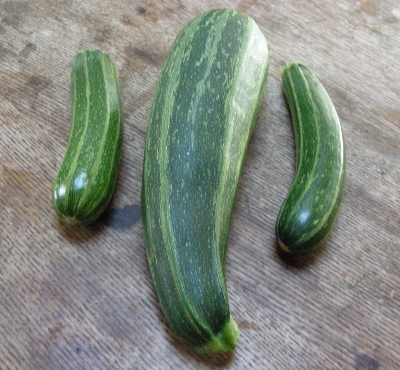
The one in the middle looks suspiciously robust, and as a general rule it’s wise to avoid any summer squash (or eggplant) so mature it has matte rather than shiny skin. But Romanesco, sold by Johnny’s and by Renee’s, among others, is the exception.
Plus it’s deeply ribbed ( usually) so the slices have beautifully scalloped edges. It’s not yet common at farmstands and greenmarkets, but it’s showing up more and more often as growers and customers alike discover its virtues.
Squash Tortilla
This has nothing to do with tacos. It’s named for the famous Spanish dish of potatoes, eggs and olive oil; and although it’s made somewhat similarly the main reason I’m calling it a tortilla is that I was scared if I called it a squash cake you’d expect it to be sweet.
It’s not. It’s essence of toothsome squash, with a soft pale green or gold-flecked center and deeply olive oil browned crust, equally good hot and cold, as an appetizer, side dish or main course. And making it is simplicity itself, assuming you have a processor with a shredding attachment and that you allow enough time (at least an hour) for the squash to sit there and drain.
For a 9 or 10 inch tortilla: 4 main dish, 6 side dish or 8 tapa servings :
3 – 4 lbs. summer squash: zucchini, Middle-East , crookneck or pattypan in any combination. Use the larger amount if squash are large; they shrink more in preparation.
1 medium onion
2 heaping tablespoons of salt (fear not, it comes back out)
3 extra large eggs or 4 smaller ones
about ¼ cup of flour
olive oil
1. If the squash is large, cut it in quarters and slice out the seedy soft center material. Otherwise just make it small enough to go through the feed tube. Shred about half of it, then shred the onion, then shred the rest. Put all the shredded material in a large bowl.
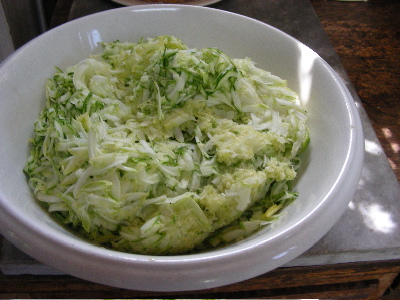
Old ironstone washbowls are ideal for mixing large quantities. They’re a much better shape than most mixing bowls, which are too narrow and deep.
2. Add the salt and mix thoroughly – your hands are the best tool for this. Put the squash in a colander over the sink or or a bowl, fit a non-reactive bowl or pan on top and weight it with something like a 5 pound sack of flour. Leave it for an hour or so, during which vast quantities of liquid will come out, reducing the squash volume by 1/3 to ½, depending.
3. Rinse the drained squash with cold running water, press out excess liquid with your palm, then repeat the weighted drain routine for 5 or 10 minutes. If you’re cooking this for someone you want to impress with your world-class cooking skills, turn the shreds into a towel and squeeze out even more moisture. Otherwise don’t bother.
4. Beat the eggs just until loosened in a large bowl, then stir in the squash. Add enough flour to turn the mixture into something the texture of cake batter, very soft and loose but with no free liquid. Pause between additions to let the flour swell, the less you use the better but if you don’t use enough the bottom crust won’t be crisp.
5. Put a heavy 9 or 10 inch skillet over medium heat and add a generous layer of olive oil. How generous is up to you but there has to be more than a slick and this would actually be good deep fried, so it’s hard to use too much.
6. When the oil just starts to smoke, turn in the squash and smooth the top. Cook until the edges start to draw in and if you lift an edge with a spatula you can see things are pretty brown at the bottom. This should take about 10 minutes.
7. Turn on the broiler, put the skillet 3 (or so ) inches under it and broil until the cake top is flecked with brown, about 5 minutes more.
8. Loosen the cake with a wide spatula. Put a large plate over the pan and – holding both firmly with protected hands – flip the tortilla out. That’s it. You could garnish it with sprigs of basil or bouquets of cherry tomatoes or whatever. Or not.
Looking Ahead: There aren’t many vegetables worth freezing plain as ingredients for later use; but if you get a good buy on good summer squash or have a bumper crop, preparing it through step 3 and then freezing it sets you up for making the tortilla (or individual squash pancakes) with lightening speed, even in the dead of winter. Double bag the shreds so the onion aroma doesn’t spread itself around and expect to drain out even more liquid after the mixture thaws.