No doubt about it, backyard leaf blowers are powerful players in the anti-social sweepstakes. Although they’ll never be as good as ATVs at damaging land while abetting childhood obesity and shattering the public peace, pound for pound they’re unbeatable for noise pollution, noxious emissions, and the erosion of ordinary civility.
On the other hand, there’s also no doubt that raking is the yard work equivalent of ironing, possibly because it’s equally taxing on the back. Even people who love gardening hate raking, even my friend and helper Kristi, a woman up for ANY outdoor task that doesn’t involve chemicals or power tools.
So I shouldn’t have been surprised when she looked at the leaf-covered Maine lawn, looked at me ( I was holding 2 rakes) and said “ I wish you had a leaf sweeper.”
“ A what?”
Next thing you know, she’d gone home and gotten hers. Turns out the hand powered leaf sweeper is the autumnal third way: a leaf gathering machine that taxes neither the body nor the environment. It looks and works about like a lawn mower except that instead of blades it has brushes. Push it along and the brushes sweep leaves up and back into a collecting sling that holds about 7 cubic feet and is very easy to empty.
Kristi’s is a 26 inch Agri-Fab which sells for around 135 bucks. There are other, ostensibly sturdier, brands but differences – except in price – appear to be pretty minor.
Good Things about hand powered leaf sweepers:
* Easy to use, after you practice for a while and learn best adjustments of brush height and handle-angle.
* Quiet, only a gentle whirr and the whoosh of leaves headed for the sling.
* Useful for other kinds of picking-up. Kristi takes hers onto the drive through her pine woods to collect the needles we use to mulch strawberries and pack dahlias.
* Comparatively inexpensive, even the deluxe 31 inch model sold by People Powered Machines is only $270.00 ( I know, I know; but it’s 2 or 3 times faster than raking and far less ache-producing.)
The Nothing is Perfect part:
* Forget it if your lawn is mostly uneven, with many little hills and minor undulations. Kristi’s works great at her place, which is more or less flat. Not great at our place, a festival of irregularity.
* Seven cubic feet is not a lot if you have a lot of leaves. Kristi puts a sheet at the edge of each lawn section and empties the collector into it several times before gathering the sheet edges and hauling the contents to the leaf pile.

Just a bit of autumnal eye candy; the leaf sweeper is on view at the sales sites and is not a thing of beauty. Chrysanthemums like these are easy to grow, about which more next spring when it’s time to order rooted cuttings.
Spring forward; fall back, say phooey to the whole probably doesn’t save energy thing. Gardeners always know what’s what, daylight-wise, and no amount of fiddling with the clock can make any more of it.
We’re already hardwired to natural seasons. Winter – finally! – is for taking a break, though it’s work to resist catalogs in which every flower is blemish-free and every fruit delicious. Spring is for doing the monster sprint: move the stuff that wasn’t divided last fall, plant and plant, weed and weed and prune and pinch andthenthenextthingyou know, it’s harvest. Roast the summer tomatoes; freeze the succotash; move the tender plants indoors and get ready to get your jollies from things that grow in pots.
Only one problem: Whether you have the above hot-cold version, the western dry-wet or the tropical wet and more wet, seasons appear to be headed toward Hades in a globally warmed handbasket. Familiar rituals need adjustment.
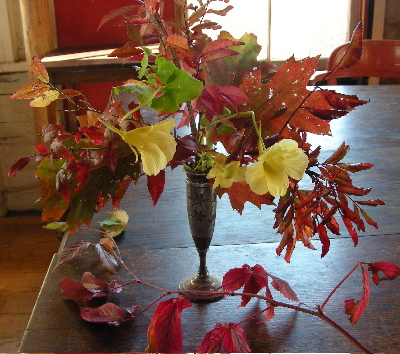
What’s wrong with this picture ( other than the fact that real autumn leaves, having been hard at work all summer, don’t look as though they’ve had work done)?
Until this year, our record late date for nasturtium killing frost was October 6th, two days later than the previous record. This year, it was the 28th. Authorities quibble about how much longer the northern growing season lasts, but nobody has any trouble tacking a week or more on each end. And nobody ( unless you count the USDA) has any trouble seeing that most northern climate zones should have higher numbers than they did a decade ago.
Coping: Don’t assume this means you’ve been promoted. Zones measure only the lowest average winter low. That means little if there is also a 6 week warm spell that starts in mid-February and plunges to a frigid end after persuading your peach trees to start blooming. In the north, planting fruit trees on north-facing slopes is more important than ever. In the south, remember the zone range has a high end as well as a low one. Cold-loving plants like sugar maples and rhododendrons are now an unwise bet at the hotter end of their range.

Warmer weather means earlier leaf-out for many trees. That means spring ephemerals like this bloodroot – and crocus, narcissus and bluebells – may not get as much sun as they need to come back strongly year after year.
Coping: plant spring bulbs closer to tree’s drip lines, or out in the open. Consider limbing up – winter is a great time to look at the shapes of deciduous trees and think sculptural thoughts.

This Magnolia soulangeana was planted by an optimist, probably about 50 years ago, and was already huge when we bought the Hudson Valley house. In the old days, it was like Charlie Brown and the football, blossoms would start to unfold, a pink cloud on the horizon and then BAM! browned by frost, year after year. Not any more.
Coping: Fine to plant trees that were once marginal but do bear in mind that fruit-free male trees aren’t problem free. They don’t bear messy or smelly fruits, but they do add to the pollen burden, and allergy sufferers are already going to take a hit: increased carbon dioxide does great things for ragweed as well as poison ivy.

(The pruner is there to show how long the spears are; they were cut in the standard way: with a knife, under ground, to deny any passing beetles a place to land.)
Bill grew up knowing that “if the patch is strong, you can cut asparagus until the 4th of July.” Not true when you start cutting 2 or 3 weeks earlier than formerly. Going by the calendar instead of the size of the spears was never a completely wise idea, but now it would be a recipe for greatly diminished production if not outright death.
Coping: Stop cutting when new shoots start being thinner and fewer. Warm winters mean more asparagus beetles ( as well as every other wretched bug I can think of at the moment). Be sure to clean away old stalks and all surrounding debris; that’s where the eggs winter over.
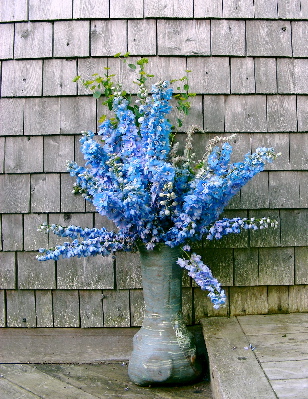
What’s wrong with THIS picture? We don’t have that all many delphiniums. The bouquet is a consequence of a brutal rainstorm.
Coping: Delphiniums are famous for this, regardless of climate doings, but there’s no question summer storms are becoming stronger. Think carefully before planting things that are vulnerable to wind. Fertilize modestly; encouraging plants to be as tall as possible is no longer a good idea unless you’re fond of the staked-up look.
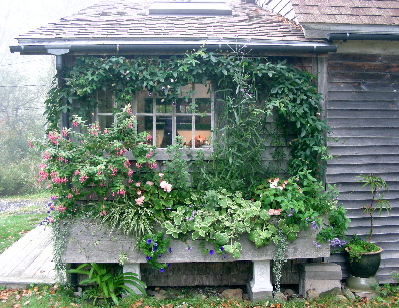
Storms are also a problem for brittle plants like tender fuchsias. The one on the left is inconspicuously anchored to the wall so strong winds won’t bust it.

This eye-catching fall display is pure genius on the part of the farmer. Not only does it announce abundance to passers-by on the busy highway, it’s also easy to cover on cold nights. Winter squash that is blemished by frost won’t keep. The grand assortment of squash that’s available at farmstands right now won’t keep either, btw; be sure to buy soon and store at home for the best flavor assortment.

It’s tempting to leave houseplants out as long as possible, especially when they’re protected by being close to the house. But if you plan to enjoy them indoors they need time to get adjusted to low light and dry air. Bringing them in when it’s still warm and bright enough to put them in an unheated sunroom or other transitional space will increase the chances that they stay strong, for when you need them most.

outside

inside. Our friend from the window box. Passionflowers are particularly willing to do the in- and – out dance. Logee’s and Brushwood Nursery are among the many sellers with tempting assortments.

Daylight saving thought to live by: Every roasted or dried or frozen tomato you put by is saved daylight; as is every flower on winter’s amaryllis, there because the bulb was nourished by sun on last summer’s leaves.
That’s potato chip as in “ can’t eat just one, ” and cheese dollars is because my version of this killer pastry – first cousin to the ever-popular cheese straw – is a bit bigger than a silver dollar. Please note I say “my” advisedly; in versions too numerous to fully research, this recipe has been around for years. But having just served them to a bunch of highly appreciative cheese dollar virgins I know there are still plenty of people who can use to hear the good news.
Insofar as it’s good. Like potato chips, cheese dollars are a symphony of sins: white flour, high fat cheese, butter and salt. Also nuts. However, there is also a secret ingredient that – if you have a good imagination – mitigates the damage.
Actually, I doubt the inclusion of Rice Krispies does much to reduce the calorie load (sorry, Carol). What it does is make cheese dollars crunchy in a distressingly addictive way, especially if you use the real thing. As a veteran of oatmeal cookies I once assumed generic crisp rice cereal would be just as good. It isn’t.
CHEESE DOLLARS
¾ pound sharp cheddar cheese, coarsely grated
6 ounces ( 1 ½ sticks) butter
2 ½ cups all purpose flour, mixed with1 teaspoon cracked black pepper, ½ teaspoon baking powder, ½ teaspoon paprika and ½ teaspoon salt
1 heaping cup chopped walnuts. Pecans are traditional but that’s probably because the root recipe is (almost surely) southern.
2 cups Rice Krispies
optional: about ½ cup tiny cubes of super-aged Gouda
1. Let the cheddar and butter soften in a large shallow mixing bowl, then mix briefly; you just need an even combination, not a uniform paste.
2. Work in the flour mixture, then the nuts. Stop here if you want to freeze the dough or refrigerate it for longer than a few hours.
3. Add the cereal ( and Gouda); it’s okay to knead it in with your hands but try not to work the dough any more than necessary. Form into walnut sized balls and place 2 inches apart on parchment paper lined baking sheets. Flatten the balls with floured fork tines. It would be nice if you could give these the refrigerator cookie treatment, but slice and bake doesn’t work. Too crumbly.
4. Bake at 350 until light gold, anywhere from 12 to 20 minutes, reversing the sheets halfway through the baking. Cool on wire racks and store airtight.
The pumpkin pie came to light while I was cruising around looking for early cheese dollar recipes. It’s hand-written in the front of my copy of The Wise Encyclopedia of Cookery, published in 1949 by Wm. H. Wise & Co. Inc. , of New York.
A nifty book, btw, over 1200 pages of definitions and recipes, most of the latter from what might be called parties with an agenda: the National Dairy Council, the California Prune Marketing Program, the American Meat Institute. But the huge acknowledgements list also includes the US Army Quartermasters Corps, the American Limoges China Corporation and – I burn to know, I truly do – the American Badminton Association.
So of course then what about the origin of Mamie’s recipe and starting to try to track THAT down when the slippery slope aspect became clear and I went out to divide the overgrown Salvia transylvanica.

All those large leaves belong to the salvia. The yellow flower with blue stems and columbinelike leaves is Thalictrum flavuum glaucum and this one has rather fallen over; the plants are about 5 feet tall and vulnerable to wind.
MAMIE EISENHOWER’S PUMPKIN PIE
Exactly transcribed from the handwritten version.
Three beaten egg yolks, ¾ cup brown sugar, 1 ½ cups cooked pumpkin, ½ cup milk ½ tsp. salt, 1 tsp. cinnamon, ½ tsp. nutmeg.
Combine above ingredients and cook in double boiler until thick, stirring constantly. Soak 1 envelope gelatine in cold water and stir into hot mixture. Chill until fairly set. Beat 3 egg whites and ¼ cup granulated sugar, then beat until stiff. Fold into gelatine mixture. Pour into baked pie shell and chill until set. Garnish with whipped cream. Makes 1 big or 8 individual pies.
I wish she’d written her name in the book, but she didn’t. And she may have gotten it second hand herself. Although it appears to be a first printing , one of the handwritten recipes is for a “TV mix” quite similar to the mid-’60s version favored by my mother. That said, my mother’s didn’t include bacon drippings, which can sometimes be an indicator of (comparative) earliness.
Brewer, Maine, October 11, 2007, a slide talk for the Maine Herb Society. We get to the part where the sky comes in, as an important part of garden design.

And the illustrative images include

Not surprisingly, people want to know what it is. Also not surprisingly, I have brain melt and forget until I’m driving home.
So. The bright red poppy is Papaver bracteatum, sometimes called the Persian Poppy or Great Scarlet Poppy. It’s a perennial, very similar in appearance, needs and habits to old fashioned Oriental poppy (P. orientale).
But Great Scarlet is accurate: flower stems are 4 or more feet tall, thicker and stiffer than Oriental stems; the flowers are a good 6 inches across and the scarlet is truly breathtaking, even redder than the Oriental ‘Beauty of Livermere’ ( or Livermore), with which P. bracteatum is often confused.
Plants of the Beauty, itself well worth having, are sold by Bluestone Perennials and High Country Gardens, but if you want true bracteatum you must – as far as I can tell – grow it from seeds. J.L. Hudson sells them, but I didn’t know that when I bought mine, from Thompson and Morgan, the seed company everyone loves to hate. T&M is expensive, especially in view of how few seeds you get, and germination problems are common. But they have a stupefying variety of nifty stuff not available elsewhere and in fairness it must be said that many of those nifty things are difficult to grow from seed. Caveat garden dreamer when browsing through the too-tempting catalog.
Happily, P. bracteatum is comparatively easy. Sowing where it is to grow is wise, and that should be in very well drained, sandy soil, in bright sun, somewhere in (roughly) zones 3-8. It will do better at the low end; winter cold doesn’t faze it but heat and humidity are not its friends. Remember that like P. orientale it is huge in spring and absent in summer.
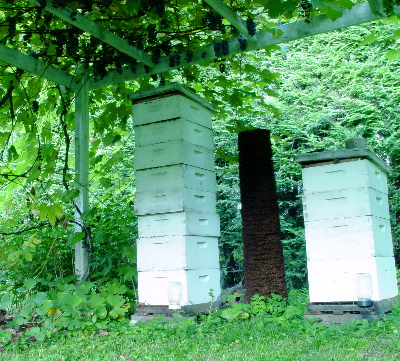
The well furnished home food garden has always and still should include at least one hive of honeybees. But this is easier said than done, so learning that bees were part of Bill’s dowry may have been the thing that clinched the deal, back when we were courting. Fast forward 16 honeyed years: I’m writing a N.Y. Times bee story and in the course of research discover – who knew? – that this little insect may well be the canary in the agricultural coal mine.
Honeybees don’t get much press compared to, say, petroleum, but their pollination services are just as crucial as fuel and fertilizer to about 15 billion dollars a year in crops, from almonds and alfalfa to sunflower seeds. More bees are needed in each place than any one place could provide, so tens of thousands of hives get loaded on trucks, taken to fields or orchards in bloom, then packed up again and hauled elsewhere.
These migratory honeybees are essential to agribusiness monocropping, which could not exist if it had to depend on local pollinators. That’s why the bees have been getting their 15 minutes of fame* – a mysterious affliction called CCD ( colony collapse disorder) has destroyed so many colonies it’s threatening a major industry. Farmers are paying much higher prices for hive rental while also worrying there may be shortages that can’t be overcome, even with expensive imports.
More than you really want to know is posted, with running updates at beeculture.com, but the very short version is:
*CCD probably isn’t new; reports of similar, albeit far smaller, epidemics go back at least as far as 1898.
* CCD is almost surely not one disease or pest or insecticide but rather some unknown combo thereof that exploits the weakness of bees stressed by profoundly unnatural ways of being kept and used. No study has yet revealed a single insult that is/was the tipping point. Each time a likely culprit is fingered, further investigation confirms that it is at best only part of the puzzle.
* Domestic honeybees are livestock: living creatures raised and used by humans. What do we know about them compared to what we know about chickens and cows? Zilch. What are we likely to learn soon? Also zilch, in part because there is no massive bee industry to lobby for public funds or undertake its own research.
The internet allows posts like this to go on at enormous length, but that doesn’t mean they should, so here are a few visuals from our own
Home Grown Honey Harvest, October 7, 2007
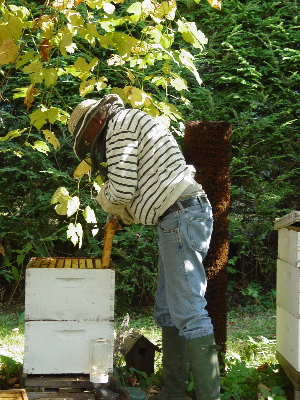
Bill checks to see if there’s any honey in the frame ( a pre-built foundation for the bees to start from).
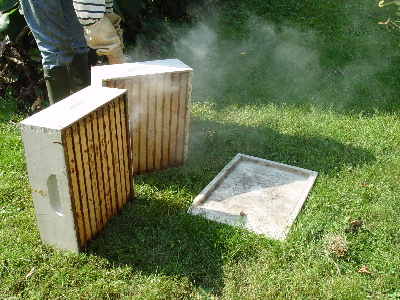
I always thought smoke made the bees think the hive was on fire, so they were too busy worrying about the house to sting anybody. Beekeepers just say it calms them, with the same result.
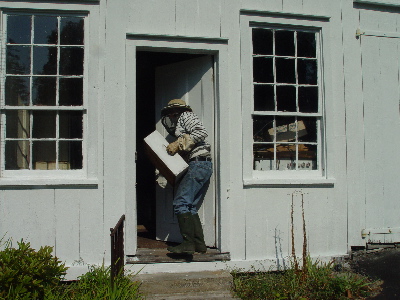
They don’t stay calm long; you have to extract the honey someplace they can’t get to, in this case the barn.
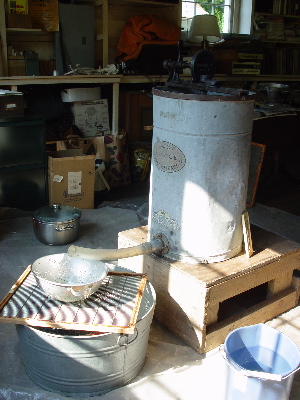
This is Bill’s honey extractor, a galvanized antique called the Root Novice. Modern extractors are steel or plastic and this is probably the place to say that honey is more or less self-sterilizing. It’s so sweet bacteria can’t grow in it and so low in water content yeasts won’t grow either. The reason you can’t give it to babies is that it can contain spores of anaerobic bacteria like botulism. The acid in all human digestive systems that process solid food prevents those spores from growing, but new people who still drink all their nourishment don’t have that protection.
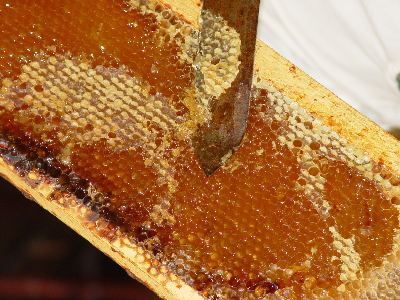
After each cell is filled with honey, the bees cap it with a wax lid. You have to slice off the lids (with a wicked sharp, thin-bladed knife) before you can extract the honey.

Bees gather honey from one source at a time. If you want to name the honey for its source – check out the list at honeylocator.com – you have to harvest it before the bees move on. The dark patch looks sort of like buckwheat but I’m sure it’s not. Doesn’t matter, whatever it is will just add complexity to this year’s vintage.

Frames are held upright by arms in the extractor. Turn the crank and the arms whirl around, flinging the honey out by centrifugal force, same as in a salad spinner.
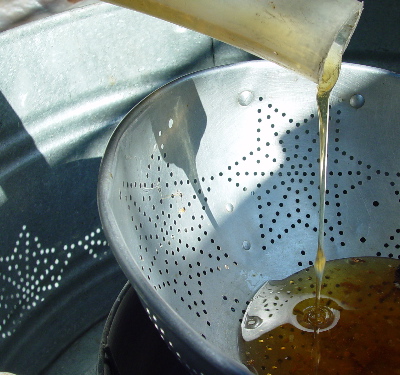
Honey isn’t the only thing that gets flung; the colander catches things like stray bits of wax and the occasional unfortunate bee that didn’t respond to the smoke.

After collection, the honey is poured into sterilized jars. Over the next couple of weeks, any tiny impurities rise and form a thin layer at the top. For gift-giving, we take the layer off. For us, we just leave it as an extra seal until we want to use the honey.

Before the equipment is washed and stored, it’s put outdoors for the bees to clean. They will retrieve almost all of the honey to add to their winter stores.
* Fifteen minutes seems to be about right. Bees are as gone from the headlines as they are from all those dead hives. Tune in next February for a brief flare-up, when almond orchards will need a surge from an army so grievously depleted it may not have enough troops.
Saving seeds sounds great at first – who could argue with growing your own heirloom seeds instead of buying them? But when you take a look at what’s involved with saving things like squash and corn seeds you start seeing the beauty of capitalism. Even easy things like beans and lettuce require you to do your spring planting with fall seed harvest in mind.
But saving tomato seeds is different. Not only can beginning gardeners do it, people who don’t even HAVE gardens can do it, because the best tomatoes to eat are also the best source of seed.
It’s one stop shopping and how great is that? You can save the seeds from a single terrific tomato, no matter where you got it. In theory, at least, you could dig the seeds from a yummy tomato served in a restaurant and save THOSE. The seeds are simple to collect and process. And they last for years.
The only must-have is a tomato that is not a hybrid (read about why here) and that means we should all be very grateful that tomato names now have cachet. Instead of “tomatoes,” pure and simple, the farmer – and increasingly the restaurant – offers Brandywines, Jetstars, Black from Tula and who knows what-all. There are hundreds of ’em. Doesn’t matter. As long as you know the name you can – bless google – just look up “xyz seed. ” If it’s a hybrid that can’t be saved, “hybrid” will be part of the description,

The actual moral of this picture is do not get to the farmers market at 9:30 AM if official start time is 9:00.
I’m going to save seeds from a tomato – a big fat beautiful delicious tomato – I bought at the Rockland, Maine farmers market a couple of weeks ago. It’s called Hillbilly Potato Leaf, so I know that like many delicious heirlooms the plant will have broader, simpler leaves than common tomato plants.

Potato leafness is on the left. These were plucked from full grown plants, but even young seedlings look different enough so you can spot which is which.
Why that might be useful will be discussed presently. For right now, while there are still gazillions of wonderful tomatoes just waiting to be enjoyed – and saved! – here’s how
to save tomato seeds
1. Choose perfect, dead ripe tomatoes. The better they are of their kind, the better your chances of repeat greatness. And of course, the riper the fruit, the more ripe seeds it will contain.
2. Cut the tomatoes across the equator. Scrape the seeds into a glass jar. The surrounding gel will come along. No problem. *
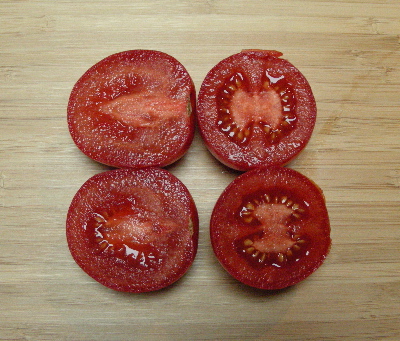
Cross-cutting exposes the seeds so you can pry them out while taking the least amount of tomato flesh. Makes no difference with these little guys (Amy’s Sugar Gem, about the size of a golfball) but if you have big tomatoes with small seed cavities there’s no point in wasting the parts you could eat.
3. Ferment the seeds.**
3a) Add enough water to the jar to make soup out of the seeds and gel. Loosely cover the jar with cheesecloth or a piece of paper towel, so air can get through. Put the jar someplace warm ( not hot), out of the sun, preferably a place where odd smells won’t be noticed.
3b) Wait 2 to 4 days, during which the jar contents will bubble , a cap of revolting moldy goo will gradually form on top of the liquid and most of the seeds will sink. Those that remain afloat are no good.
3c) Lift and discard the cap. Fill the jar with room temperature water and gently swish the seeds around to wash them. Carefully pour off the water and debris, then put the seeds in a strainer and rinse under running water. Don’t press on them; they don’t need to be squeaky clean.
4. Spread the seeds on a paper plate (they stick to china and to paper towel) and let them dry out of the sun, stirring from time to time to expose all surfaces. When they’re dry enough to rattle, they’re ready to store. As long as they stay dry, cool and dark the container is up to you. An ordinary envelope labeled with variety and date will do, but a tightly-lidded jar is better. And if you want to reward yourself – or use the seeds as holiday gifts – there are all sorts of inexpensive supplies like resealable seed packets and moisture proof vials at Garden Medicinals and Culinaries.
* The gel around tomato seeds contains most of the acid that makes sweetness interesting. Recipe instructions that tell you to remove seeds from raw tomatoes should probably be ignored, but if you want to follow them be sure the recipe includes some other source of acidity.
**Many garden bloggers say they don’t bother to ferment tomato seeds and it isn’t absolutely essential, But it does 3 important things:
+ It removes the germination inhibitor that keeps the seeds from sprouting inside the tomato.
+ It gets rid of many seed-borne diseases
+ It separates good seeds from defective ones, vastly improving the quality of your stash.
September 17, 2007 @ 10:57 am • Filed under
All Recipes,
books, tools and appliances,
from the garden,
Garden,
Housekeeping,
Preserves, Pickles and Relishes,
The view from here,
Tips •
No Comments
SOME PLACES TO PUT FOOD BY
(so you can eat locally all year long)
Upstairs: Food Historian Sandy Oliver keeps winter squash under the bed. Bottom of the linen closet is also good; just don’t forget they’re there.
Downstairs: An unheated basement ( 35 to 45 degrees) , a second refrigerator ( or the back of the one in the kitchen) is almost a root cellar. Things to keep in it from harvest to spring: Beets, Carrots, Cabbages, Onions, Wine, Beer, Cheese.
In a cool back bedroom or similar: Potatoes. They like to be cold, but not quite as cold as other roots.
In the pantry/ food cupboard:
Dried: Wild bolete mushrooms, wild or cultivated agaricus mushrooms, tomatoes, shell beans.
Canned: Applesauce, fruit spreads, ketchup, tomatoes, roasted tomatoes for instant sauce.
In the garden: lightly mulched Parsley and Kale will survive until a very hard freeze (@ 26 degrees); the more slowly it gets cold, the more cold they can take. Chard, Brussels sprouts and Broccoli raab aren’t quite as hardy but still can stand – indeed benefit from – repeated light freezes. Many gardening and country food books, including some of mine, suggest leaving beets and carrots in the ground under a heavy mulch and then harvesting as needed. It works fine if you don’t have voles.
In the freezer: Wild mushrooms (morel, chanterelle, sulfur shelf, blewit, hen of the woods) sautéed in enough butter to be a sauce for the pasta, baked potato, winter squash or other starch that is then dinner; Toasted almond pesto or other pesto to use like the mushrooms ; Berries; Whole tomatoes for soup and sauce; Full-meal soups like Minestrone and Corn chowder, Harvest Vegetable Stews like corn, squash and pepper/ tomato, pepper and onion/ snap and shell beans with summer squash. Chickens. Your quarter of a local lamb, pig or steer, divided into the cuts you’ve ordered. Make an inventory and keep it near the freezer!( along with a pen on a string for crossing off)
September 15, 2007 @ 10:33 am • Filed under
All Recipes,
from the garden,
Garden,
Preserves, Pickles and Relishes,
Soups, Salads, Sauces and Snacks,
Tips,
Vegetables •
No Commentsand a great deal else in a minute (famous last words). For now, the recipes for an omnium-gatherum vegetable soup and a freezer friendly pesto as promised to everyone at MaineFare!
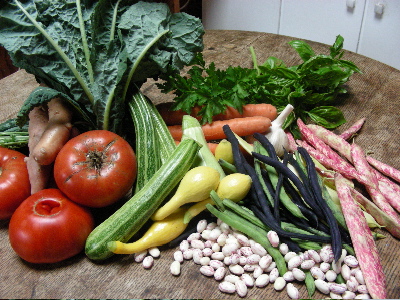
Incipient minestrone, partly gathered from my garden but not all of it because I don’t grow kale, potatoes, shell beans or carrots.
SEPTEMBER SUNSHINE MINESTRONE (aka) Harvest Vegetable Soup
This is a very general guideline; as long as you start with the flavored broth, include both starchy and delicate vegetables and use enough of them to make the soup hearty without turning it into stew, you’re in business.
Classic recipes include pasta or rice and I used to too. But now I don’t, because flexibility trumps the tiny gain in convenience you get from freezing the soup “complete.” There’s usually leftover cooked pasta or rice lying around in the fridge and when there isn’t we just use more good bread – French or Italian, generally – which IS always lying around and may be the most delicious choice anyway.
For about 12 main dish ( large ) servings:
1/3 pound lean salt pork or fatty bacon, cut in 1 inch chunks
3 large cloves garlic
½ loosely-piled cup flat-leaf parsley, leaves and tender stems
grated zest of 1 lemon
1 large onion, cut in small dice
3 quarts water – quality matters. Use filtered if your tap is chlorinated
3-4 cups root vegetables, cut in roughly ¾ inch chunks. Carrots and potatoes mostly, some parsnip and/or turnip if you like but not too much as both of these are rather aggressive.
2 cups fresh shell beans
½ cup celery in medium slices. Not thin. Not chunks.
2 cups firm summer squash, crookneck or small zucchini, cut in roughly ½ inch slices . Halve the squash the long way first if they’re more than about an inch thick.
1 ½ cups snap beans ( Romanos are lovely if you can find them) cut in 1 inch lengths.
3 cups ripe tomatoes, peeled and coarsely chopped
About 3 cups chopped kale or savoy cabbage
A good sized handful each chopped Italian parsley and basil
1. Chop pork, garlic and the half-cup parsley until it looks like hamburger – the processor is fastest ( if you don’t have to wash it by hand).
2. Put the olive oil in a heavy kettle over low heat, add the pork mixture and lemon rind and cook, stirring, until most of the pork fat is released. Add the onion and keep cooking until it is wilted and starting to turn gold.
3. Add the water and bring to a boil. Put in the root vegetables and shell beans, adjust the heat so the liquid just simmers and cook until the vegetables are about half done – no longer crisp but still somewhat tooth-resistant, 15 to 20 minutes.
4. Add celery, squash, snap beans and tomatoes and cook until the roots are tender and the snap beans are al dente, about 20 minutes more.
5. Now the kale and cooking until it’s tender, 10 to 15 minutes. Add the herbs. Let them wilt, then taste and adjust the salt.
6. Serve with pesto – your own, pistachio (scroll down to find it) or Toasted Almond (below), a better choice for freezing. Freshly grated Parmesan is traditional but if you have good local hard cheese why not experiment? You can also skip the cheese entirely or switch it 180 for an entirely new taste treat. Sprinkle some small chunks of young mozzarella over the hot soup as soon as you ladle it into the bowls. It should be somewhere between soft and melted when everyone starts eating.
Note: this produces a soup that’s just barely done, on the theory that it is going to be frozen, which softens things, then reheated, which softens them some more. If you’re planning to eat it right away, cook until the kale is almost falling apart before you add the herbs.
TOASTED ALMOND PESTO
As usual, quantities are just guidelines. Even more than usual, actually, given the difficulty of measuring fresh leaves and the enormous variability of fresh herbs. The goal is to have a fairly even mixture of almond and parsley flavors, with a strong accent of basil and a mild accent of garlic.
To make lots of this for freezing, make multiple batches; the processor heats up the pesto if you ask it to grind too much. The multiples go very fast since you don’t have to wash the processor between them.
For a scant cup, about 8 servings depending on what you’re doing with it:
1/3 cup toasted almonds. (see note about skins)
2 medium sized cloves of garlic – use large if it’s hardneck.
1/3 cup olive oil
2 loosely packed cups chopped Italian parsley, leaves and tender stems.
1 loosely packed cup basil leaves
2 or 3 leaves of sorrel or a squeeze of lemon
pinch of salt
1. Put almonds and garlic in a processor and grind, scraping down the sides from time to time, until you have fine meal. Add about a third of the oil and a teaspoon of water and grind again until you have a paste – it won’t be smooth, but it will be cohesive.
2. Add the herbs (lemon juice) and salt and about a tablespoon of water. Grind to puree. Add the remaining oil and puree again. The pesto should have the texture of thick mayonnaise. If it’s still too solid, add water in very small amounts until it’s right. The more water you add, the more beautiful the color will be. Try not to get too carried away.
Note: The most delicious way to make this is to toast the almonds in their skins; dump them into boiling water; simmer for about 3 minutes, then leave them in the hot water while you work with small batches at a time, pinching the skins off. The boiling not only loosens the skins but also softens the nuts so they grind to a smoother paste. This is not fast work.
In theory, you could buy blanched almonds, toast them, then just give them a brief swim to soften, but blanched almonds – including those hotsy totsy Marcona almonds – don’t taste as good as almonds in the skins. Must be something about the industrial blanching process. I just use the toasted almonds and leave it at that. (If you soften the almonds in their skins and then try to grind them without peeling, the skins don’t grind smoothly with the nuts).
Don’t panic. It’s only summer we’re coming to the end of. Even here in the far Northeast there’s still at least a month of delicious Romanesco zucchini, pale-skinned Middle Eastern cousa and the buttery old fashioned yellow crookneck that’s now almost exclusively a home garden delight.
At first glance, this may seem like no big deal. Zucchini and straight necked yellow squash are year-round supermarket staples, and most winter versions of these vegetables are – unlike winter tomatoes – edible. But they are also edible as in “ eat your vegetables” rather than edible as in “oh YUM! How do you make this thing?
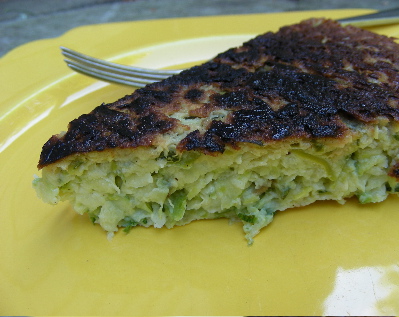
(Squash Tortilla. See below.)
Long about now you may be thinking you’ve totally had it with zucchini, even absolutely perfect zucchini, and that if you find under the leaves or are given by an evil friend one more dark green baseball bat, you will subsist henceforth on potato chips.
But stay! There are two things to consider:
1) There’s no point in trying to stay ahead by harvesting the babies. Tiny squash with the blossoms still attached don’t taste like much of anything no matter how fresh they are.

The one on the left is about 1 day from perfect; the flower is just opening and has not yet been pollinated. The one on the right – I really have seen them this size in stores – is ridiculous. It would also be ridiculous if it were a crookneck or Cousa. The potential for flavor is there, but flavor itself is not.
2. You will not easily tire of zucchini if it’s Romanesco, aka Costata Romanesco, a uniquely firm and nutty variety. This one does taste good when it’s quite small and, even more astonishing, the not-seedy part will still be worth eating when the thing’s the size of your forearm.
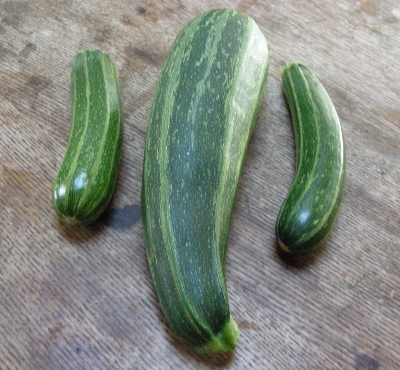
The one in the middle looks suspiciously robust, and as a general rule it’s wise to avoid any summer squash (or eggplant) so mature it has matte rather than shiny skin. But Romanesco, sold by Johnny’s and by Renee’s, among others, is the exception.
Plus it’s deeply ribbed ( usually) so the slices have beautifully scalloped edges. It’s not yet common at farmstands and greenmarkets, but it’s showing up more and more often as growers and customers alike discover its virtues.
Squash Tortilla
This has nothing to do with tacos. It’s named for the famous Spanish dish of potatoes, eggs and olive oil; and although it’s made somewhat similarly the main reason I’m calling it a tortilla is that I was scared if I called it a squash cake you’d expect it to be sweet.
It’s not. It’s essence of toothsome squash, with a soft pale green or gold-flecked center and deeply olive oil browned crust, equally good hot and cold, as an appetizer, side dish or main course. And making it is simplicity itself, assuming you have a processor with a shredding attachment and that you allow enough time (at least an hour) for the squash to sit there and drain.
For a 9 or 10 inch tortilla: 4 main dish, 6 side dish or 8 tapa servings :
3 – 4 lbs. summer squash: zucchini, Middle-East , crookneck or pattypan in any combination. Use the larger amount if squash are large; they shrink more in preparation.
1 medium onion
2 heaping tablespoons of salt (fear not, it comes back out)
3 extra large eggs or 4 smaller ones
about ¼ cup of flour
olive oil
1. If the squash is large, cut it in quarters and slice out the seedy soft center material. Otherwise just make it small enough to go through the feed tube. Shred about half of it, then shred the onion, then shred the rest. Put all the shredded material in a large bowl.
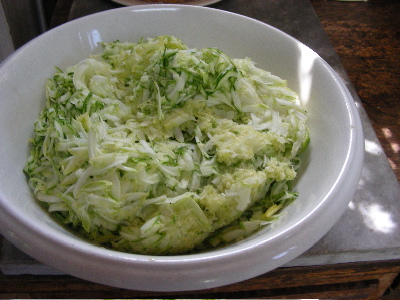
Old ironstone washbowls are ideal for mixing large quantities. They’re a much better shape than most mixing bowls, which are too narrow and deep.
2. Add the salt and mix thoroughly – your hands are the best tool for this. Put the squash in a colander over the sink or or a bowl, fit a non-reactive bowl or pan on top and weight it with something like a 5 pound sack of flour. Leave it for an hour or so, during which vast quantities of liquid will come out, reducing the squash volume by 1/3 to ½, depending.
3. Rinse the drained squash with cold running water, press out excess liquid with your palm, then repeat the weighted drain routine for 5 or 10 minutes. If you’re cooking this for someone you want to impress with your world-class cooking skills, turn the shreds into a towel and squeeze out even more moisture. Otherwise don’t bother.
4. Beat the eggs just until loosened in a large bowl, then stir in the squash. Add enough flour to turn the mixture into something the texture of cake batter, very soft and loose but with no free liquid. Pause between additions to let the flour swell, the less you use the better but if you don’t use enough the bottom crust won’t be crisp.
5. Put a heavy 9 or 10 inch skillet over medium heat and add a generous layer of olive oil. How generous is up to you but there has to be more than a slick and this would actually be good deep fried, so it’s hard to use too much.
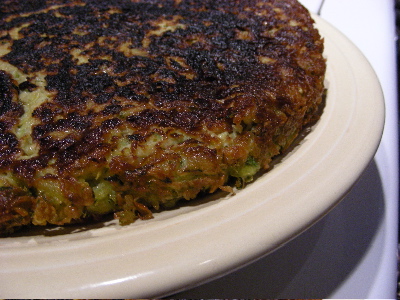
6. When the oil just starts to smoke, turn in the squash and smooth the top. Cook until the edges start to draw in and if you lift an edge with a spatula you can see things are pretty brown at the bottom. This should take about 10 minutes.
7. Turn on the broiler, put the skillet 3 (or so ) inches under it and broil until the cake top is flecked with brown, about 5 minutes more.
8. Loosen the cake with a wide spatula. Put a large plate over the pan and – holding both firmly with protected hands – flip the tortilla out. That’s it. You could garnish it with sprigs of basil or bouquets of cherry tomatoes or whatever. Or not.
Looking Ahead: There aren’t many vegetables worth freezing plain as ingredients for later use; but if you get a good buy on good summer squash or have a bumper crop, preparing it through step 3 and then freezing it sets you up for making the tortilla (or individual squash pancakes) with lightening speed, even in the dead of winter. Double bag the shreds so the onion aroma doesn’t spread itself around and expect to drain out even more liquid after the mixture thaws.
We are in the glory season for Oriental lilies, great big killer-fragrant beauties that are among the brightest stars of the late summer garden.
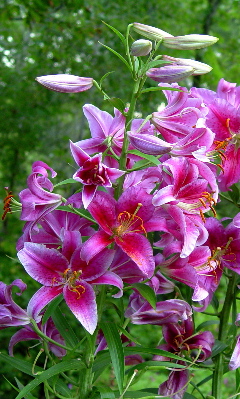
And as most veteran lily growers know, that means we’re also in the season of nearly indelible bright gold pollen stains on anything and anyone who happens to brush those loaded anthers.
Florists deal with this problem by removing the offending dye-stuff, which not only makes the flowers stain-free but also ( according to some) enables them to last longer. Gently grasp each dangling anther with the blades of a small pruner and pull, don’t snip. The docked filament will spring back gracefully and come to a point instead of looking pruned.
Not surprisingly, castration makes the blooms look sterile and somewhat fake; not plastic, exactly, but incomplete. The best solution is to have a lot of lilies ( fighting the beetles as described here and doctor only those blossoms that face traffic.

That way, your lilies won’t gild anybody…
And vice versa, I hope. “Gild the lily” may be considered a standard idiom, but I say it’s spinach and I say the hell with it. Among other things, Shakespeare’s original “paint the lily “ ( King John; I had to look it up) actually makes sense:
SALISBURY:
Therefore, to be possess’d with double pomp,
To guard a title that was rich before,
To gild refined gold, to paint the lily,
To throw a perfume on the violet,
To smooth the ice, or add another hue
Unto the rainbow, or with taper-light
To seek the beauteous eye of heaven to garnish,
Is wasteful and ridiculous excess.